by Abco | Feb 9, 2016 | Maintenance
Receiving Your Vending Machine Step 1:
Receiving your vending machine is very exciting! First, inspect the vending machine as you unpack it and ask the driver to wait a few moments until you have done a quick inspection. Once you have signed off, you are responsible for the external condition.
If there are problems, note them on the bill of lading.
Receiving Your Vending Machine Review all documents attached to be sure that it is consistent with your order.
Once the vending machine has reached its destination, the shipping boards can be removed. Split the shipping boards with a wedge or crowbar at either end.
Do not tilt the vending machine or attempt to lift it with a two wheel truck.
Next, level the machine and adjust the four main legs so they are touching the floor.
Place the vending machine 5 feet from the designated power outlet. The ventilation opening in the back must be clear of obstructions.
For refrigerated models allow at least 4 inches between the wall and the back of the vendor for proper air circulation.
For indoor vending machines:
The power cord kit will be located in the coin box area. Before plugging the cord into the wall outlet, leave the metal cover attached and plug the cord into the connector at the rear of the machine. Using the screws provided, secure the protective cover and strain relief in place.
Warning: The false leg helps prevent the vending machine from tipping forward when the vending door is open and one or more bottle trays are extended. Failure to install the false leg on vendors with bottle trays may result in serious injury.
Get more vending tech support videos.
Step 2:
AMS SPEAKER: When the AMS vendor arrives, please take time to inspect the vendor as you unpack it. Whenever possible, ask the delivering driver to wait a few moments while unpacking is completed. This will be to the driver’s advantage since, if no problems are found, the driver and his company are not responsible for any external damage. Likewise, be sure that you inspect your vendor fully. Once you have signed off without comment, you are responsible for the external condition. If there are problems, note them on the bill of lading and be sure to keep a copy. Be sure to review any documents attached to be certain the information shown is consistent with your order. For example, match the serial number on the back of the carton with the serial number on the packing slips.
Step 3:
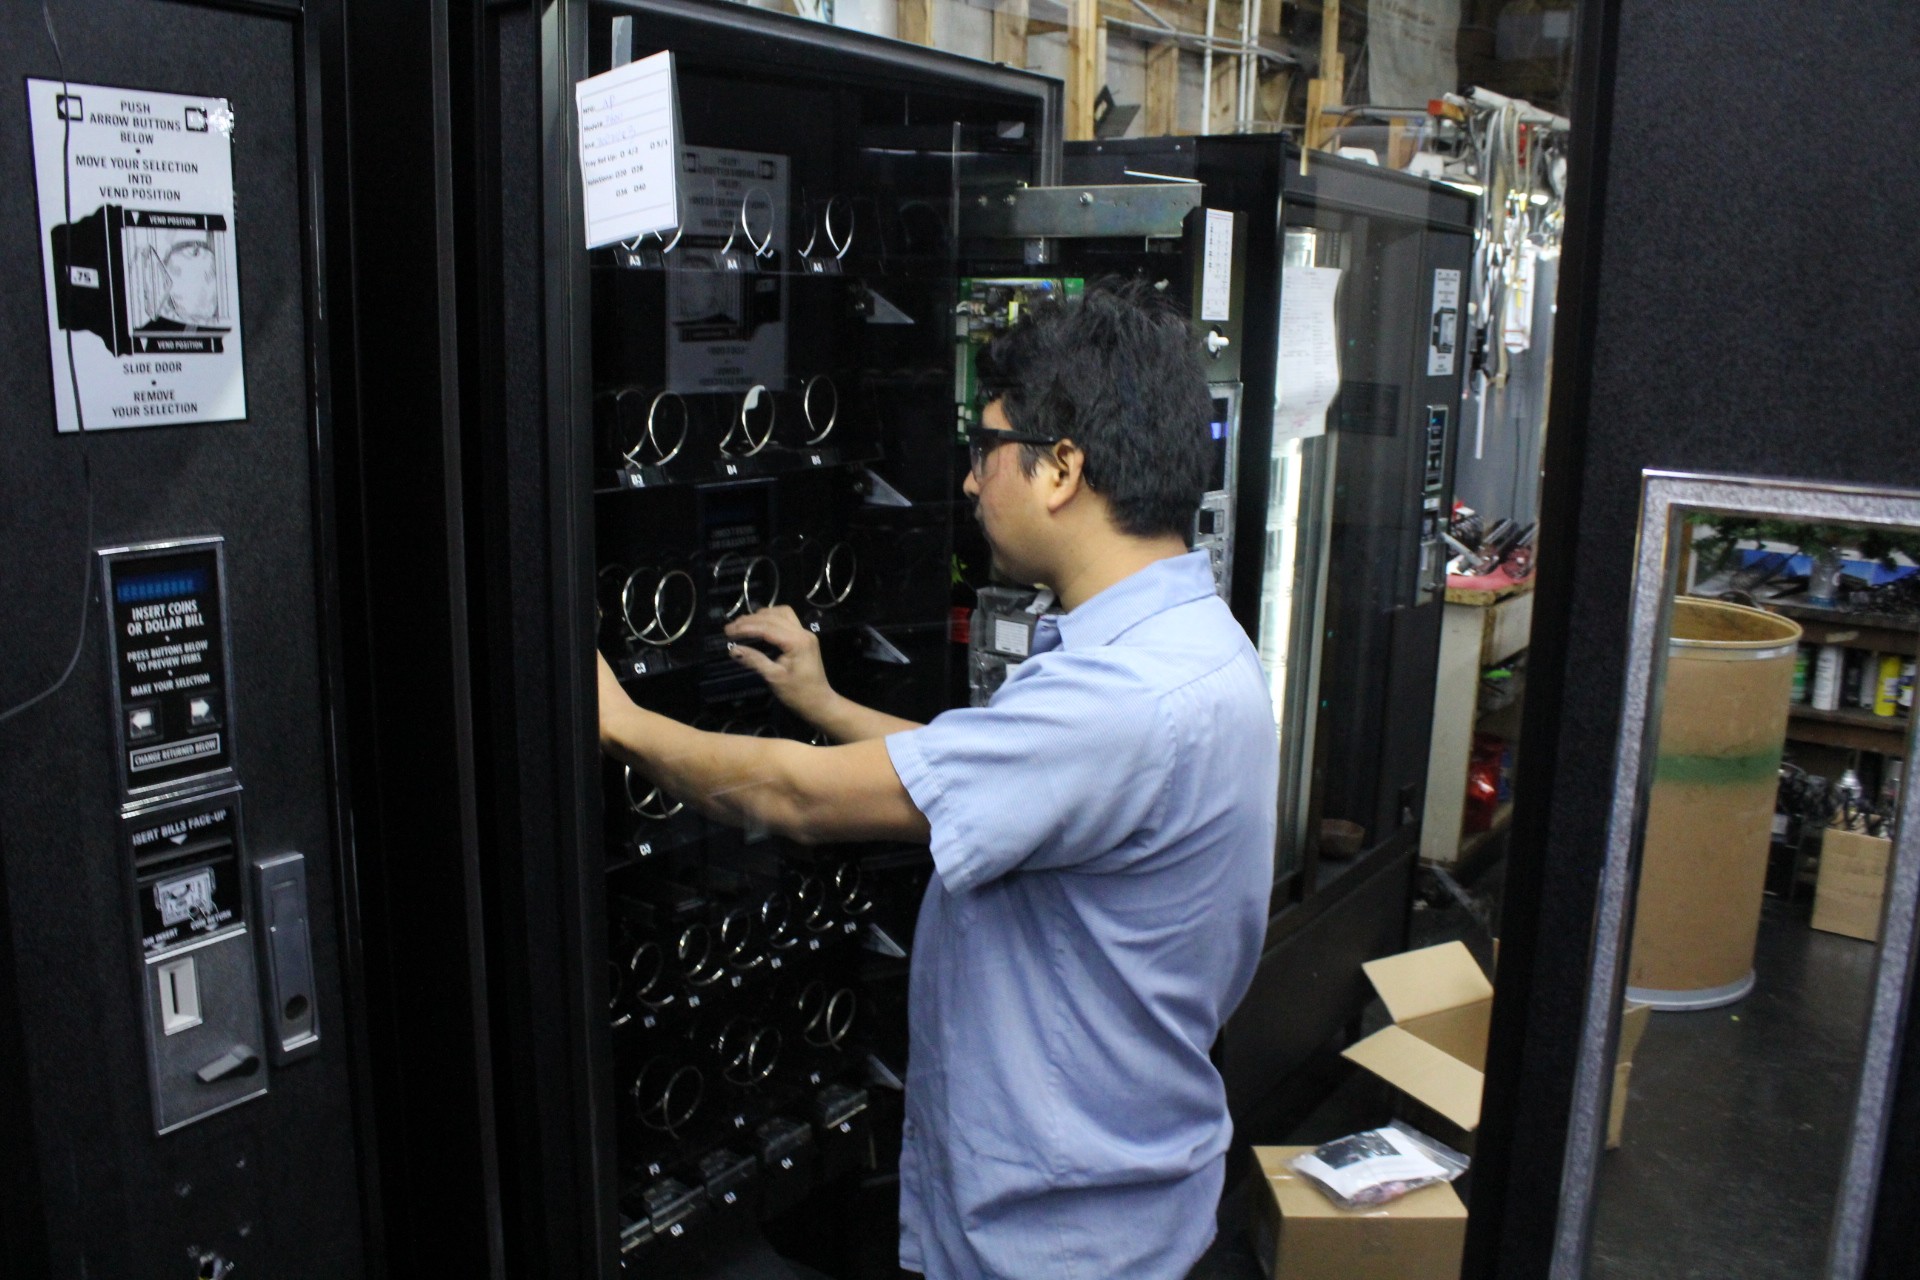
AMS SPEAKER: Once you have received your vending machine, the shipping boards can be removed. Split the shipping boards with a crowbar or wedge at either end. If necessary, lift the vendor to remove the broken boards using properly rated equipment. Do not tilt the vendor and do not attempt to lift the vendor with a two wheel truck. For safe operation, the vendor must be level. On the bottom of the vendor are four threaded leveling legs located at the corners of the cabinet and a fifth support screw is located under the door. With the door closed and locked, check the four main legs and adjust any leg that is not contacting the floor. A level may be placed on top of the cabinet.
AMS SPEAKER: Adjust the support screw after the machine is leveled until the door does not hit the roller. Place the vendor within five feet of the designated power outlet. The power outlet should be accessible when the vendor is in position and the ventilation opening in the back of the vendor must be clear of obstructions. For refrigerated models, allow at least four inches between the wall and the back of the vendor for air circulation. The following is for all indoor vendors only. A one quarter inch nut driver is needed. The power cord kit will be located in the coin box or coin box area. The kit includes the power cord, power cord cover, wire tie which is already attached to the cover, and six screws.
Receiving Your Vending Machine Step 3:
AMS SPEAKER: Before you plug the cord into the wall outlet, leave the metal cover attached. Plug the cord into the connector at the rear of the machine as shown. Using the six screws provided, use a one quarter inch nut driver to secure the protective cover and strain relief in place. The false leg helps to prevent the machine from tipping forward when the vendor door is open and one or more bottle trays are extended. Failure to install the false leg on vendors with bottle trays may result in serious injury. Make sure to Receive your Vending Machine with these steps
by Abco | Sep 23, 2014 | Vending Tips
Vending operators cause their own service calls by the actions or in-actions of the route man:
- Without a well planned and timed service schedule (or route scheduling system), your machines will run out of product… and cause a service call.
- You leave out of date product in your machines… “I bought the product and it’s stale.”
- You open the door to your machine. Do you open the door of every machine at every stop even when if it’s only making enough money to open the machine every other stop? (Here’s an alternative) Every time you open the door of the machine, there is a possibility for something to go wrong in the machine. Mechanical and electronic things break over time with use.
- You open the door, but you forget to lock it when you leave.
- If you open the door make sure you close it, lock it and make sure it accepts money with a coin and bill test before you leave.
What service issues do you deal with? (Share them and any questions you have in the comments below)
Episode Transcript:
Vending Operators Cause Their Own Service Calls Tom Shivers: I’m Tom with the Vending Business Show, here again with Larry Towner of Service Group International. He’s a vending business consultant and we’ve been discussing some interesting topics lately. What are we going to talk about today, Larry?
Larry Towner: Today I think we’re going to talk about, I know we’re going to talk about Vending Operators Cause their Own Service Calls, and you think it doesn’t happen, but it does.
Tom Shivers: So you’re saying vending operators are causing service calls?
Larry Towner: Yeah, they cause their own service calls, and between an operator and/or a route man, you get service calls that are caused by the actions or inactions that you take, I guess I want to say, so let’s start off with one of my favorites. It’s always the one I usually do.
Larry Towner: It’s called poor planning or a lack of a good schedule. You pretty much know if you don’t have a great schedule out there, you don’t plan your time well. You’re going to get service calls if your machines run out of product. This is a very simple thing, but you’d be amazed how many people don’t have a good route scheduling system so they run out of product or whatever, but they don’t show up at their accounts on a regular basis, so that’s really one of the first reasons why you can cause service calls into your own accounts.
Larry Towner: Another one of my favorites is you leave out-of-date product in your machines. Nothing will generate a service call faster than somebody saying, “I bought the product and it’s stale,” because I’m going to guarantee you, they’re going to call you when that’s the case. “I lost my last 50 cents forever that I ever had in my whole life. You need to come pay me back or send me the money.” Yeah. I would if you’ll send me a self-addressed stamped envelope, so that’s one of the things.
Larry Towner: Here’s a third one. This is one that’s going to surprise a lot of people, and you’ll laugh at this one, Tom. Big reason why you cause your own service calls, you open the door to the machine. Now, that’s sounds funny. You have to open the door to the machine to service it, right, and that’s true, but I guess the question is is do you open the door every time you go to an account or not on every machine. We’ve discussed this in a past show about it gets back to your scheduling and your route things, but if you don’t generate a certain amount out of that machine, like let’s say you’ve got a drink machine and a snack machine. The drink machine generates plenty of money out of it and the snack machine generates enough money for you to open the machine every two weeks, open the machine every two weeks. Don’t open it every week, because every time you open that door, here’s what happens, right? First off, the computer disables because you take the power off, or almost all machines, the interlock switch comes on and the power goes out on the machine. Well, every time you do that, you open the possibility for something to go wrong in the machine. It’s just the way mechanical stuff works. It’s mechanical, electronics, whatever it is. That’s how stuff happens.
Larry Towner: The other thing that you do is there’s cables between the door and the machine. Well, every time you move those cables, you cause to have the potential for pinching a cable or cutting a cable or, shoot man, wire breaks, just after a while, it work hardens and breaks. Anyway, so it sounds funny, but opening the door is one of the reasons why you cause your own service calls.
Larry Towner: Fourth reason why you cause your own service calls, and this has to do with opening that dad gum door again. This is a big problem. You open the door, but you forget to lock it when you leave. If you’ve been in the vending business for a while, you’ve gotten calls where hey, you left the door open, and unless somebody knows how to, on some of the doors, unless somebody knows how to operate it, they’ll lock the door, but they’ll leave the door open, so they might try to help you out, but generally if they say the door’s open, you need to go do it.
Larry Towner: One of the fifth reasons, and this all has to do with opening the door, if you open the door, make sure you close it, number one, make sure you lock it, number two, pull on the door to make sure it’s actually locked, which has always been one of my favorites. I always grab the top corner of the machine and yank on it a little bit, and if it didn’t open, it was good, but before I left every account for a machine that I opened, I coined and bill tested the machines. I made sure that when I shut that door that that machine functioned, at least took money, right, and so … it accepted money, that’s the better thing. It doesn’t take somebody’s money because we don’t want it to take somebody’s money without giving them product, but we make sure that that thing accepts coins and accepts dollar bills because you’d be amazed. Again, when you open those doors and the interlock switches and stuff, and the computers go down, stuff happens. It’s what happens.
Larry Towner: Tom, any questions on that?
Tom Shivers: That’s some great, great tips there. Maybe there’s some questions that people might have about certain service issues that they’ve had that they could add to the comments below.
Larry Towner: Sure.
Tom Shivers: All right.
Larry Towner: [inaudible 00:05:04]
Tom Shivers: Well, yeah, and do subscribe. We have a good time on this show, and we’d like to hear from you, so if you have a question, send it in, and you’ve been watching Vending Operators Cause their own service calls from the Vending Business Show, a publication of A&M Equipment Sales.
by Abco | Jul 29, 2014 | Start A Vending Machine Business, Vending Business Show
Vending Operator Basic Tools When servicing an account and before leaving, that machine needs to be clean and looking good! There are many different cleaning supplies to carry with you:
- Glass cleaner
- Squeegee
- Paper towels
- Soft bristle brush
- Dow scrubbing bubbles
- General purpose cleaner
- Small vacuum cleaner
Vending operator Basic Tools The basic tools you need to service a vending machine:
- Phillips head screwdriver, #2
- Flat Head screwdriver, #1, #2
- ¼” socket set
- 11/32” Nut Driver, Deep
- 5/16” Nut Driver, Deep
- Channel Lock Pliers
- Vice Grips
- Needle Nose Pliers
- Electrical Tester
- Strip and Crimp tool
- Scissors
- Clear Tape, 4” wide
- Business Cards
- Money Bags
- Hand Truck
- Coin and Bill Counters
- Planograms
- Brochures
Episode Transcript:
Vending operator basic tools Tom: I’m Tom with the Vending Business Show here again with Larry Towner, the vending business consultant with Service Group International and we are continuing in this series of vending business tools. Thanks for being here Larry. What are we gonna be talking about today?
Larry: Well, today we’re gonna talk about the basic toolkit for a route man and/or a basic toolkit for an owner/operator.
Tom: What’s first?
Larry: Well, let’s talk about a route man’s basic toolkit. You’re all, if you’re an owner/operator, you’re running route anyway so you’re gonna need these things but one of the big mantras in the vending business is clean, filled, and working and so we’re gonna talk first about cleaning vending machines. There are, it’s really, really important when you go into a, into one of your accounts and you’re servicing an account, that when you leave, that machine is clean. You want it to be clean but at the same time, you wanna be very efficient in how you clean and how you get things done because you want it to be, you want it, it’s your place of business. It needs to look good.
Larry: The first thing that I always like to carry, there’s several different things in cleaning supplies that I always like to carry, but the biggest that most vending companies have is glass because of course, the front of a vending machine is a large piece of glass so I always carried some kind of a glass cleaner. I just used basically Windex or any kinda multipurpose glass cleaner is what I use but I also always carried a squeegee and I’m gonna tell you why I carried a squeegee. The squeegee allows you to take that glass cleaner and clean it much faster and much more efficiently than if you tried to use paper towels all the time. So I always carried glass cleaner and a squeegee, along with paper towels, I would use the paper towels to clean the edges and I would also rub the front of the machine down if it was particularly dirty with the paper towels and then use the squeegee to liquid off.
Larry: There’s all kinds of cleaning techniques but in my opinion, you definitely have to have a squeegee. It makes things go much, much, much faster. I also always carried a soft bristle brush because I would take, and in a dusty location, you can take a soft bristle brush and you can just brush the dust right off the tops and fronts of the machine and you just brush that stuff off and it takes that dust off. Then I would actually brush it first and then I would go clean the glass from there.
Larry: I also found, had great success with one particular product. It’s rare that I support one particular product but I got a tip from a guy one time to use Dow Scrubbing bubbles and what he told me to use Dow Scrubbing bubbles for was that Dow Scrubbing bubbles will remove scuff marks from the fronts of your machines down at the bottom. Now, we all know Tom that nobody ever kicks a vending machine. We all know this to be the self-evident truth but every [inaudible 00:02:55] like in a lot of my locations, I would go in and find black shoe marks on the fronts of my machine.
Larry: Now I don’t when that was happening but it seems like that people must have tripped or something. That’s had to be what it was.
Tom: Yeah, there’s no way they were kicking it.
Larry: No, there’s no way they were kicking it. But anyway, so in their tripping, and they tripped and they happened to scuff the machines up, I found that Dow Scrubbing bubbles, you spray it on there, you let it sit for a minute and then you take the paper towels off, and it really, really works really well at getting those scuff marks off the fronts of the machine. I suppose there’s a generic brand of something like it, but I just had such good luck with that Dow Scrubbing bubbles that I always had Dow Scrubbing bubbles with me to get scuff marks and it’s also a good general purpose cleaner, but it really works well on scuff marks. There’s other products out there. There’s some products called Spray Nine that I know people use. Joe at A & M Equipment uses Spray Nine all the time. It’s a great cleaner for inside your machine. You need some kind of a general cleaner also to use, besides the Dow Scrubbing bubbles, just some kind of water and type mix to clean with.
Larry: But those are the big things. You gotta have the ability to clean the fronts of the machines. And the fronts and the insides too. I used to carry, I also carried a small vacuum with me that I would have in the truck if I needed it to go vacuum out a machine. If a package broke open inside a machine and it spilled contents into the vend tray or did something like that, I would have a small vacuum with me and I could vacuum out the insides of the machines. So those are some of the real basic cleaning tools that you need.
Larry: Let’s go into just the real, actual tools you need if you’re gonna do basic service on a vending machine and the tools are very, very simple. You need a number two Philips head screwdriver. You need a number two flat head screwdriver. I always carried a number one screwdriver that would clip on my pocket, in my pocket with me all the time. I had a quarter inch socket set. I always had an 11/32 nut driver D, and I always had a 5/16 nut driver D also. You’re gonna use both of those if you’re gonna do anything on a vending machine, you are gonna run into those two things. I always carry Cannalocks. I always carry vice scripts. Needle nosed pliers. Electrical tools, I had an electrical tester with me, a voltage tester. I had a strip and crimp tool with me also. Usually, had some electrical tape. Things like that. That’s the basic toolkit that you’re gonna need to do any kind of basic maintenance on a vending machine that does not have to do with doing installations. I mean, just talking about basic maintenance.
Larry: Then I always carried a marketing kit with me as well. And in that marketing kit was like a four inch wide clear tape. I had scissors. I had business cards. I had brochures. I had everything for contact information that somebody, if they asked me, and they needed to get a hold of me or get ahold of the company, I had a piece of information there for ’em. I think that route men should always have business cards of some sort that they can hand out to customers for contact information.
Larry: And then we have money handling tools. So you have money bags and then bill and coin counters. Those are kinda issues for the office to handle but money bags are critical for a route man, he’s gotta have money bags, gotta have a way to count out each machine and put it into his bags.
Larry: Those are the basic tools that you’re gonna need to run a vending a route actually, to actually service accounts. So we’ve talked about hand trucks in a previous show and how we got a basic tool kit. Tom, do you have any questions.
Tom: No, that’s a lot of tools there but I know those are all necessary so is there anything else we’ll be discussing in the next show?
Larry: We’ll probably talk about money handling next.
Tom: All right. Getting more good tips about the vending business. Be sure to subscribe. You’ve been watching Vending operator Basic Tools at The Vending Business Show, a publication of A & M Equipment Sales.
by Abco | Jul 1, 2014 | Start A Vending Machine Business, Vending Business Show
Vending Operator Tools Planogram
Vending Operator Tools Planogram A planogram is used in retail stores to arrange certain items in specific locations to get the maximum number of sales. In a vending machine we use planograms similarly: Once the items are put in a planogram items that sell in that particular location thus making more money. In the planogram we can then track what sells and what doesn’t. If an item is selling real well you might want to put two rows of the same item. This is a win for you and a win for the customer. An item that isn’t don’t run it. With a planogram you should be able to lower your stales or out of date merchandise in the machine thus saving money. You can then change out your next planogram to what is actually selling in the machine. Remember people get tired of the same old thing so change some items in your planogram every week.
- Have all products arranged in the same place which will help with operations, continuity through all machines, helps with efficiency and profits.
- Par levels are set to reflect the rate of sales for a product in the machine so that product does not run out but there are few left when the route man shows up.
Vending Operator Tools Planogram Most manufacturers of vending machines will show you where to place items for better sales.
Download the form or create your own, then post it inside your machines so you can see it when you open the door of the machine.
The important thing is that you use this concept in your business. Vending Operator Tools Planogram .
Episode transcript:
Vending Operator Tools Planogram Tom: I’m Tom with the Vending Business Show. Here with Larry Towner of Service Group International. He’s a vending business consultant. Today, we’re talking about tools. Both conceptual tools that will help you be more efficient, and also, physical tools. Thanks for being here Larry. What are we going to start with?
Larry: Well, I thought today, that we would start with a conceptual tool. Vending Operator Tools Planogram One that has a lot to do with marketing and things like that. It’s called a planogram. What a planogram is, is a planogram is how you arrange your machines in the vending business. The concept comes from planogram, if you been in retail, you know what planogram is. You work in a retail environment, planograms are used all through grocery stores and almost any retail business has a planogram. It has certain items in certain places so that you get the maximum number of sales.
Larry: In a vending machine, what that is, is that there’s a couple of reasons to use a planogram. One is that you have your products all in the same place, which is going to help you operationally, so you’ll know what products go where. In particularly if you have a route man or multiple people servicing your machines. You will have continuity through all of your machines, which subsequently gives you better data as far as what’s selling and what’s not selling, and things like that. It’s a very, very powerful tool. It really wants to, rather, it helps you with how you set your machines up. It helps you with your efficiency. It helps you with your profitability.
Larry: In a previous episode, we had discussed where you could actually do placement of the machines, as far as which products go where, and that information is compiled by most of the manufacturers that tell you were to put things.
Larry: Vending Operator Tools Planogram So, what we’ve got here, is we’ve put up a picture here of what a planogram looks like. This is a planogram picture that I built a long time ago. We used it extensively when I was running a vending business. We actually have the word product on the top level and the par level below that. So, the product obviously, is what product are you going to put in there. That depends on the conceptual arrangement of your machines. But, you put your product, and you basically write it in there, or in this case, you can type it in there.
Larry: Par level is the other really important thing. Not everything sells all at once. So, different products sell at different rates. Our goal, when we were running a vending company, was to have machines not run out of product, but also not leave a lot of product left in the machine, which is a very bad use of inventory. We always put par levels in there. A par level, on a really popular selling item like a Snickers, or a Dorito product might be 12. You might put 12 items in there. On a real slow selling product, something that just might not sell that well, you might put a par level of four.
Larry: What you do is, when you come back to the machine, you’ll actually know if you had a par level of four and two items are gone, you know you sold two items. If you come back and you had a par level of 12 and all of the column is empty, well maybe you need to take that par level up to a 14 or something like that.
Larry: That’s the basis of what a planogram is. It’s how you’re going to arrange your machines. Again, you need to, with these forms, and we actually printed them out, and we taped them up on the insides of our machines. We put them up above the changers, so every time we opened the door, we knew what was supposed to be in the machine. That’s kind of an old school way to do it, but I’ll tell you what, it works. It’s inexpensive, and it’s very, very simple.
Larry: Tom, do you have any questions on a planogram?
Tom: So, I guess they’re different for every type of machine, perhaps. But, you can modify this anyway you want?
Larry: You can modify this form anyway you need. You can either add columns or subtract columns. You can cross things out. However you need it to work. Or, you can actually get into the program and actually change the form itself. But, the form isn’t what’s really important. What’s important is the concept and that you actually use it. So, take it and put it in your machines and make sure everybody follows it, or put it in a notebook and carry the notebook. That works too. I always found it easier to leave it in each machine. That way, you never had any doubt as to what’s supposed to be where.
Tom: Alright, Larry. Well, thanks so much. We’ll have a link to download this planogram, so you can just print it off or put it on your computer, modify it, use it the way you want.
Tom: Also, if you want more vending business tips like this, be sure to subscribe. You’ve been watching Vending operator Tools Planogram the Vending Business Show. A publication of A&M Equipment sales.
by Abco | Feb 25, 2014 | Start A Vending Machine Business, Vending Business Show
Servicing New Vending Accounts getting Organized An interview with Larry Towner
Servicing New Vending Accounts Getting Organized In the last video, Larry explained how to efficiently load a drink machine. In this video we’ll learn how to organize your truck for efficiency.
When at your warehouse (or Sams Club) or buying product for your accounts, how do you put them in your vehicle? Do you:
A. Throw the boxes in your truck helter skelter,
B. Open the boxes and throw them in your truck helter skelter, or
C. Arrange them in some kind of organized fashion.
Servicing New Vending Accounts Getting Organized is everything – your warehouse and vehicle – so you know where everything is located. We loaded our vehicles like we did our machines.
We hope you’ve enjoyed our video series on how to service a vending account (please share this series with a friend), more videos are on the way.
Subscribe to get more vending business tips.
Episode Transcript:
Tom Shivers: Servicing New Vending Accounts Getting Organized I’m Tom, with the Vending Business Show, here again with Larry Towner, where we’ve been talking about what to do when you land a new account in your vending operation. So last, we talked about to handle snack and drink machines. How to take care of those, stocking them and so now what’s next, Larry?
Larry Towner: Well this is kind of a combination deal. This is what you do before you go to service an account and what to do after you service account. This has to do … We’re gonna talk about how you handle your products, getting them in and out of your vehicles and in and out of your truck.
Larry Towner: Some of the things to think about, Tom, are that, again, we’ve talked about efficiency in the other segments that we did, and back to being efficient, you know. The only thing you really have is your time and we wanna be super, super efficient.
Larry Towner: So I have a question for you. When you’re at your warehouse or you’re at the Sam’s Club and you’re buying the product for your accounts, and you go to put ’em in your vehicle, how do you put ’em in? Do you, A, just throw them in helter-skelter, B, open all the packages and throw them all in helter-skelter, or C, put them in in some kind of an organized fashion?
Tom Shivers: Probably B. But I know that’s wrong.
Larry Towner: Yeah. Well. So here’s the deal right? The way that you would do that is … and I mention this ’cause you wanna be organized. Organization is everything. So when you purchase your products or you go to your warehouse if you have a warehouse, you wanna have your vehicle organized in such a way that you know where your products are. How you choose to do that is your business, but you need to have some sort of a system that organizes your products in a way that you understand, so that you can quickly access those products.
Larry Towner: We worked on a planner-gram, we’ll get into that. That’s an advanced vending concept, so we won’t talk about that right now, we won’t talk about that for some time yet in this series, but we worked on a planner-gram, and basically all our machines were the same. But we used to load our truck just like we loaded our machines, so everything was done by shelf and not so much by column, but definitely by shelf. So all of the shelves were the same, so that when we went to pick a product out of our truck or put product into our truck … it doesn’t matter, it’s one and the same … they went in into specific locations.
Larry Towner: So the top shelf items went in the top shelf, the middle shelf items went in the middle, bottom shelf items went in the bottom. That way … I’m a very simple person. I get confused easily. So if I have ’em all in the same way, very, very simple, the truck looked like the machines. Think that works, Tom?
Tom Shivers: That sounds like you’re cutting down on time there.
Larry Towner: Well we’re cutting down on the time ’cause we wanted to get in and out as quickly as possible. So when we would come out of the Sam’s Club or come out of our warehouse … didn’t matter really, was one and the same, they’re all a warehouse … loaded the truck up in that way, and then when we went in to go take our product into the account, came out in the same way.
Larry Towner: And so, critical thing, because you’re not gonna realize how much time you waste if you just walk out and throw the full boxes out into the truck, with no organization, you’re digging and you’re moving and you’re doing this and you’re doing that and you’re moving it. Now, I mentioned that option B, the one you selected, was you open the boxes and just threw everything into the truck. When you go into the account, and you come out of the account, what do you have? You have a lot of open boxes with partial product in it, right?
Tom Shivers: Right.
Larry Towner: ‘Cause you don’t put the whole box out there all the time. You think that’s true, or not?
Tom Shivers: No, probably not. Especially if you have a pick-list.
Larry Towner: Yeah. We talked about a pick-list in one of the previous shows. But you go in, if you take 48 Snickers candy bars in there, you’re not gonna put 48 into the machine. The chances are, unless it’s absolutely their favorite item, you’re not gonna do that.
Larry Towner: So if you just throw the half-full box into the truck when you get done, that box is gonna break open and you’re gonna have Snicker bars all over your truck. Or you’re gonna have bags of potato chips all over your truck. Again, been there, done that, don’t wanna do it again. Terrible waste of time having to pick product up off the floor of your vehicle.
Larry Towner: So have an organizational system for your vehicle. It’s your choice. There’s lots of ways to set your vehicles up. Just know where everything is. That’s what we’ve got for this segment.
Tom Shivers: Excellent stuff there again Larry. Tell us how people can contact you.
Larry Towner: They can get a hold of me, they can contact me at [email protected]. That’s the best way. Send me an email. ServiceGroupInternational, one word, @gmail.com.
Tom Shivers: Alright. And you’ve been watching Servicing New Vending Accounts Getting Organized at the Vending Business Show, a publication of A & M Equipment Sales. Some other blogpost to check out Vending Machine License: Is It Something You Need?